The time has come. You have finally reached the realization that you need a new floor. Whether you are renovating your home or just replacing the tile your bathroom—the time has come to replace your floor. For the most part, floor removal is pretty cut and dry. However, what you may not realize is that there are significant differences between DIY floor removal and hiring a floor removal specialist. What is even more important to know is the effects that virtually dust-free floor removal has on you, your home, and your environment.
Did You Know?
The average American household contains up to 7,000 types of dust-related bacteria and 2,000 species of fungi?
DIY vs. Floor Removal Specialist
DIY projects are fun, and can save you more money, right? Before tackling a DIY floor removal projects, you must know what is involved in the process. For example, let’s say you want to remove your tile floor in your bathroom. Before we begin, there are some things you must consider. Depending on the construction, the tile in your bathroom may be attached to bare cement, plywood, or mason board underneath. Whatever lies beneath the tile floor, once you begin the floor removal process, there is no going back.
DIY
Step 1: Remove Fixtures

First thing first, you must remove all the fixtures that may get in the way and make the process of floor removal difficult. You must start by turning off the water supply before removing sink and toilet. When removing the toilet, make sure to drain reservoir, bolts, and carefully remove it.
Step 2: Create a Starting Point
Try to find a bare edge that is exposed to create your starting point for floor removal. You may have to get a hammer and chisel to break out tile to create a starting point and for prying up tiles. Remember, tiles are attached by adhesives and can require a lot of effort to remove.
 Step 3: Remove tile
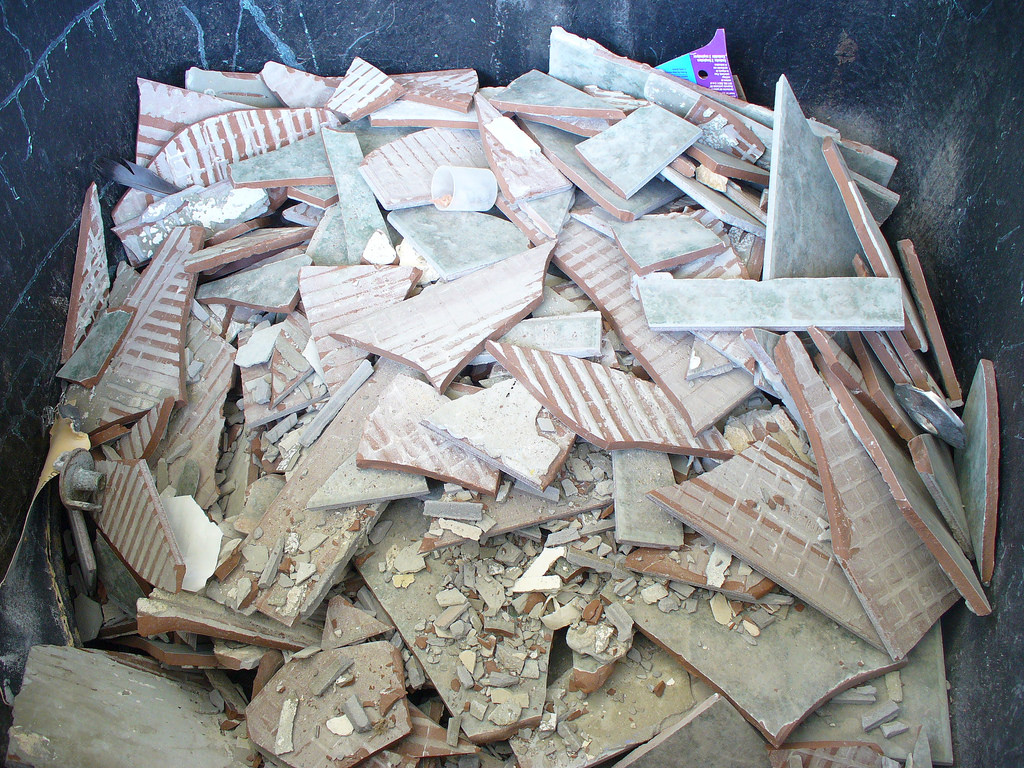
From your starting point, you will continue to hammer, chisel, and pry. This can be very time-consuming. You will dispose of old tiles into a trashcan as soon as you begin removing them, so they don’t pile up. This will require many trips to your local disposal center. Tile is also very heavy making it difficult to haul.
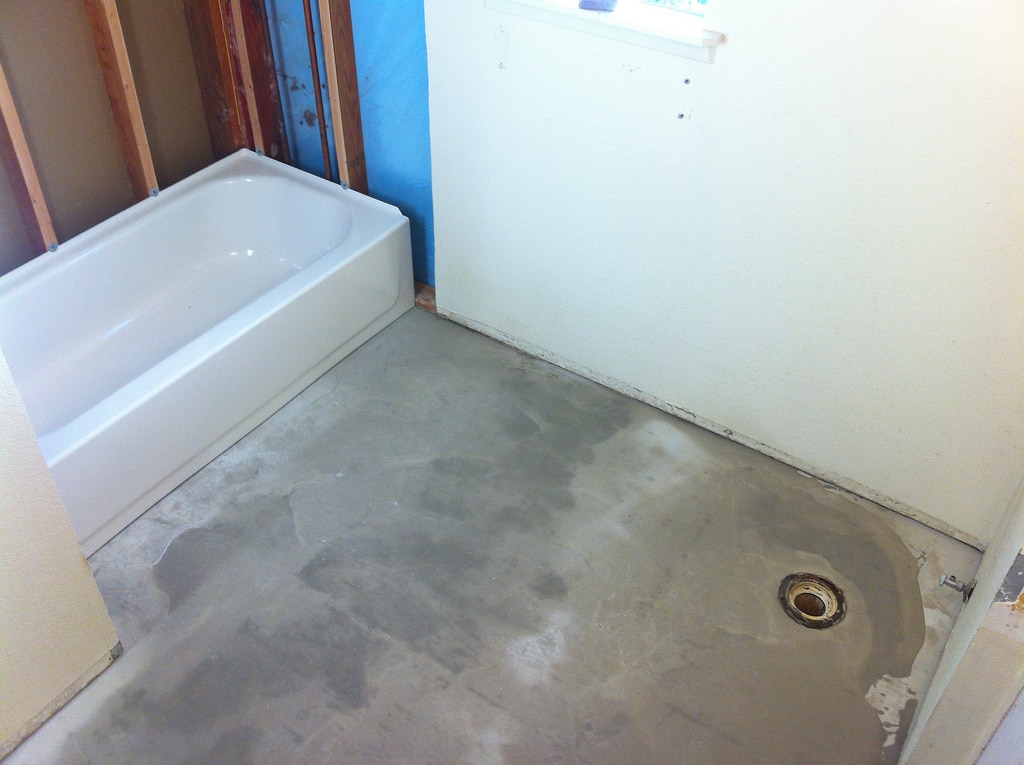
Step 4: Underlayment
Best case scenario, the tile will be directly attached to the concrete floor. However, it may also be attached to plywood; this is a very common practice. If there is any damage to the underlayment, it should be removed. Very rarely will your underlayment be perfectly intact. This means removing damaged underlayment and replacing it.
Step 5: Clean
Lots of sweeping! You MUST clear the underlayment of all debris, or new floor installation will be nearly impossible. This also means making sure surface is clear of nails, adhesives, and dust.
Step 6:
Make sure your tile is removed, and clean. Now you must inspect subfloor for holes, divots, and any other damage. You must also make sure subfloor is level. The subfloor must be smooth, clean, and damage-free for new floor installation. If not, DIY floor patching and floor maintenance must come first.
Floor Removal Specialists
If DIY doesn’t sound like something you would enjoy doing, we don’t blame you! DIY floor removal involves hasty, back breaking, dirty work. Just remember, there are trained specialists that do this daily that can save you time and money. Trained floor removing specialists use technologically advanced equipment to get floors removed efficiently and effectively.
Floor removal specialists use emission-free, battery powered pieces of equipment that are capable of removing floors from an entire house or building in just one day. Hiring the professionals assures an efficient process that causes less damage, less stress, and less time for everyone involved.
Floor Removal Machines
At Speedy Floor Removal, we use top of the line machines that can remove the flooring and its coating in homes and businesses throughout all of North Central Florida. We often use two machines to completely remove flooring.
Floor Removal
The first machine used to remove your floor is specifically designed to remove tile, hardwood, carpet, and more! A trained specialist drives this piece of equipment throughout your home or businesses to remove all of the flooring. Our team safely disposes old flooring and makes sure your sub floor is prepped for the next part of our process.
Coating Removal
Within a matter of hours, we are half way done with the floor removing process. The second step to this process is removing the adhesive and coating from the subfloor. This is the most important step to the installation of your new floor. This step also is where the most dust is produced.
Virtually Dust-Free Floor Removal
The biggest advantage to hiring a floor removal specialist is the guarantee of dust-free floor removal. This feature is only truly accomplished when HEPA Certified Air Cleaners with vacuum suction are directed at the source of the dust as it is created. This method secures dust that is even unseen to the naked eye.
Floor Removal can generate pounds of harmful dust particles.
Dust particles created from flooring, tile and more contain chemicals known as crystalline silica. Silica dust is very hazardous. These particles can get into your lungs and cause lung problems for you and your family. Dust can also trigger asthma symptoms as well. By not using the virtually dust-free procedure, you are exposing you, your family, and your friends to harmful dust particles that cause bigger problems in the future.
More About Speedy Floor Removal
Speedy Floor Removal serves Gainesville, Jacksonville, and the surrounding areas in Florida. Our team is highly trained with the best floor removing procedures, guaranteeing exceptional service and quality that works every time. When you need to remove a floor in your home or business, make sure to contact Speedy Floor Removal. We can assure that your renovation will be easier, stress-free, and most importantly—cleaner.